This post contains items that I use and love. If you take action (i.e. make a purchase) after clicking one of the affiliate links, I’ll earn some coffee money, which comes at no extra or higher cost to you.
Oh boy, where do I even begin? I have been eager for quite some time to figure out the method that works for me in starting a gluten-free sourdough starter. It’s a challenge for sure since gluten-free baking is a world of its own. And, who doesn’t want to munch on a delicious piece of warm bread from the oven?
Admittedly, I get a little envious of every Reel showing off that perfect loaf of artisan sourdough bread. I can make a great loaf of gluten-free bread (namely, focaccia and drop biscuits), but sourdough? That seems like a complicated next-level step.
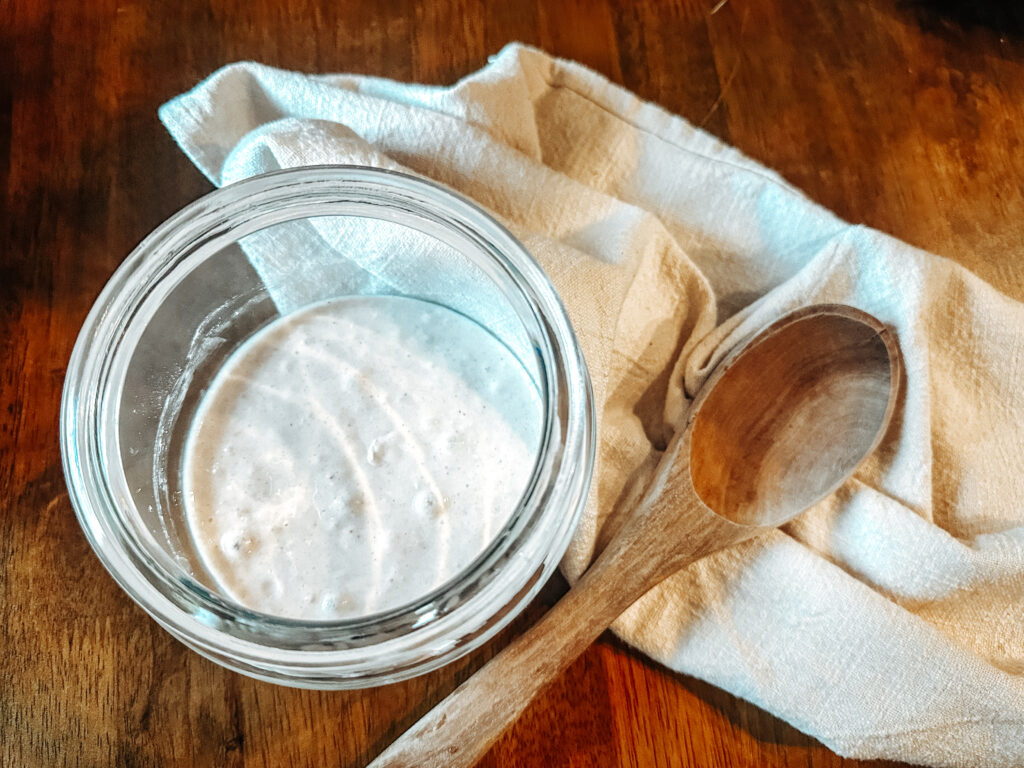
Something you should know about me is that I like things that seem complicated but are very simple. I live by the motto of not complicating things… ask my husband. From any standpoint in my life, I always aspire to be uncomplicated. While it might look complicated, this whole gluten-free sourdough thing, I promise you, it’s not. I have gone down the deep dive of blogs and Pinterest pins using about two to three different types of flours, complicated and routine feeding times.
Y’all, I don’t have the time, energy, or patience for any of that. But, what I do have time for is feeding a little sourdough and not making it a big deal in my life. It’s easy, not gimmicky and just another method of baking in my book. So, I am telling you how (for free, cause we ain’t gatekeeping this stuff), on how to get started with an easy, uncomplicated gluten-free sourdough starter.
The Flour Type: I will always stand by King Arthur Bread Flour as my top choice. For anything I am baking (unless otherwise noted), I will use King Arthur. (King Arthur, please sponsor me haha). My first attempt was with King Arthur Measure for Measure, but because my water type and temperature was consistently off, it failed. My second attempt was with Bob Red Mill’s brown rice flour, but it molded and smelled horrific after the fifth day of feeding. Plus, it was such an expensive flour to use as a starter. You have to remember, for up to 10 days, you are discarding and adding more flour. So, you want something reasonable especially with gluten-free flour. Some are crazy expensive, but King Arthur seems to be reasonable for the amount and quality of it.
The Water Type: Yes, despite what I have said, the water and temperature of the water you use are super important. I have made three different attempts at making a gluten-free sourdough starter, and the one thing I attribute to my failures was the water. Water from the sink (gross) doesn’t work, and neither does cold water. So, I used filtered water and kept it at room temperature.
The Jar Type: I started mine in a wide-mouthed mason jar but recently moved it to a larger glass container. I did this because I am past the phase of feeding it every day, and I didn’t want to fully commit to a larger jar until I knew this thing was going to work. Silly, sure, but I don’t have a ton of counter space, so that was important for me. I have linked two other jars that are similar to mine. I grabbed a medium-sized from Hobby Lobby and got it transferred into it’s new home.
The Feeding Method: My first attempt, as mentioned, was with King Arthur Measure for Measure. I went back to this flour because it is a staple in my gluten-free pantry. I use it in almost every baking recipe because I refuse to make gluten-free baking and living complicated. (You can read about our gluten-free journey here). I am listing out my exact feeding method below using room temperature spring water and King Arthur Gluten Free Measure for Measure flour:
Day One: 1/4 Cup Flour and 1/4 Cup Room Temperature Water. Stir well and make sure to scrap the sides down using a spatula. Store in a warm area of your home! This is super important throughout.
Days Two – Six: Discard half and feed 1/4 cup flour and 1/4 room temperature water. Stir well and scrap the sides. Keep it stored in a warm area of your home!
By Day Seven, your starter should be bubbling and starting to double in size. If not, repeat the second step.
Assuming it is doubling and bubbling (my favorite part), try to discard and feed twice a day. This seems like a lot of effort, but you are only doing this for about three to four days. I am confident that by day ten, your gluten-free starter will be mature enough for you to start using. So, keep that goal in mind.
Here is my exact schedule below that I kept a note of on my phone:
| Start Date/Day | Feed Ratio | Notes |
| Day One: 11/15 | 1/4 W, 1/4 F, 24 hours | |
| Day Two: 11/16 | 1/4 W, 1/4 F, 24 hours | |
| Day Three: 11/17 | 1/4 W, 1/4 F, 24 hours | |
| Day Four: 11/18 | 1/4 W, 1/4 F, 24 hours | Beginning to Double |
| Day Five: 11/19 | 1/4 W, 1/4 F, 24 hours | Doubling |
| Day Six: 11/20 | 1/4 W, 1/4 F, 24 hours | Doubling, little bubbles |
| Day Seven: 11/21 | 1/4 W, 1/4 F, 12 hours | First Day Double Feeding; |
| Day Eight: 11/22* | 1/4 W, 1/4 F, 12 hours | Doubling and Bubbling |
| Day Nine: 11/23 | Potential Feed as D8 | Doubling and Bubbling, transfer to fridge |
*If bubbling and doubling in size by day 8, store in fridge and feed in a week.
As you can tell, mine took nine days to start doubling and bubbling with the twice-a-day feed.
Why Transfer to Fridge?
If you’ll notice, on day nine I transferred my mature starter to the fridge. I did this to stop its growth while we traveled over the Thanksgiving holiday. This held for a week until we got back home. When we returned, it had stalled, which is what I wanted. I removed it from the fridge, immediately discarded half, and fed it 1/4 cup flour and 1/4 room temperature water. I stored it in a warm place and within two days of twice a day discarding and feeding, it was doubling and bubbling (noticing a trend yet?!). We love to see the double and bubble, friends!
Once I felt like it was back on track and maturing, I transferred it to a larger container that I could easily scoop out of and fed it without discarding it.
Why not discard?
I am planning to “discard” when I make my first loaf of artisan bread in a couple of days. I want to feed it at least two more times so I have enough to bake a loaf. This method will ensure I have enough to bake with and enough left to feed for future use. Plus, if I ever need to temporarily stop it’s growth, I will add it to the fridge. This is not recommended since you cannot refrigerate and then take it out to use. It needs to be nourished with the discard/feeding method for at least two days before baking with it to revive it. Gluten-free requires things to by hydrated, so keep that in mind as you plan.
Yes, it’s a process, but as you can see it is simple, uncomplicated, and a great challenge to dive into when you’re ready.
Be sure to follow my Instagram (@gratewithgillespie) for more information and to follow my journey.
Best,
Hannah




Leave a Reply